Search me

Showing posts with label Windows. Show all posts

Thursday, August 18, 2011

Windows Tools


III. A. Windows Tools – Command Prompt

There are a few ways on how to start the command prompt:
  • Start Menu > Programs > Accessories > Command Prompt
  • Start Menu > Run… > type “cmd”
  • Win+R (“Windows” key + “R” key) > type “cmd”

Commands: (add /? to see the switches and how they’re used)
  • dir” – lists directory contents or searches for a specific file/directory
  • cd / md / rd – change/make/remove directory
  • del – delete file
  • attrib – change the attributes of files/directories


III. B. Windows Tools - Registry Editor

  • C:\Windows\regedit.exe
  • Run… > “regedit”


III. C. Windows Tools – Group Policy Management

  • C:\Windows\system32\gpedit.msc
  • Run… > “gpedit.msc”

Tackling Side Effects

IV. A. Tackling Side Effects – Disabled Command Prompt

  • gpedit.msc > User Configuration > Administrative Templates > System > “Prevent access to the command prompt” > “Disabled”

IV. B. Tackling Side Effects – Disabled Task Manager

  • gpedit.msc > User Configuration > Administrative Templates > System > Ctrl + Alt + Del Options > “Remove Task Manager” > “Disabled”
  • cmd > “reg add HKCU\Software\Microsoft\Windows\CurrentVersion\Policies\System /v DisableTaskMgr /t REG_DWORD /d 0 /f

IV. C. Tackling Side Effects – Disabled Registry Editor

  • gpedit.msc > User Configuration > Administrative Templates > System > “Prevent access to registry editing tools” > “Disabled”
  • cmd > “reg add HKCU\Software\Microsoft\Windows\CurrentVersion\Policies\System /v DisableRegistryTools /t REG_DWORD /d 0 /f
IV. D. Tackling Side Effects – Missing “Folder Options”

  • gpedit.msc > User Configuration > Administrative Templates > Windows Components > Windows Explorer > “Removes the Folder Options menu item from the Tools menu” > “Disabled”


IV. E. Tackling Side Effects – Shutdown on “cmd”

  • C:\Windows\regedit.exe
  • HKLM\Software\Microsoft\Command Processor > “AutoRun” > delete value (will usually contain “pc-off.bat”
  • After the above, you can now use your command prompt.
  • cmd > search for “pc-off.bat” and delete the file
IV. F. Tackling Side Effects – Traces of “autorun.inf”

Search every drive and every folder for instances of “autorun.inf” including normal, hidden, and system file attributes. Malicious “autorun.inf” files are usually found in root drives other than Drive C: and have hidden and/or system file attributes by nature. Don’t delete all the “autorun.inf” files you see because there are legitimate programs that use this file for automatically running upon detection (like the Microsoft Office CD, for example).


IV. G. Tackilng Side Effects – Suspicious Processes in the Task Manager

Signs of Infection


II. A. Signs of Infection – Disabled CMD, TaskMgr, Regedit

Worms usually infect units and disable as many ways to remove the infection. These range from disabling the command prompt (to disable absolute control over files), the task manager (to disable stopping certain tasks from running), disabling the registry editor (to disable us from removing the effects of the infection from the computer), and others.


II. B. Signs of Infection – Shutdown Upon Execution of the Command Prompt

As stated above, this is another method of disabling the command prompt with the additional nuisance of a computer shutdown if you even attempt to launch the command prompt. This is usually caused by a file that’s attached as an autorun everytime the command prompt is executed.


II. C. Signs of Infection - Missing “Folder Options”

Infections may also include the disability to see hidden and system files by removing the “Folder Options” in the Tools menu in Windows Explorer. This is done so that we won’t be able to change the visibility of files whose attributes were changed to “hidden” and/or “system”. If we can still view the Folder Options anyway, we won’t be able to switch from “Don’t show hidden files…” to “Show all hidden files…”


II. D. Signs of Infection – Unable to Safely Remove Flash Drive

“Safely” removing a flash drive or removable drive involves the computer checking if the flash drive is still being used or accessed. “Safely” removing a flash drive just makes sure that the computer is not reading or writing data onto the flash drive anymore. Being unable to remove your flash drive “safely” using the “Safely Remove Hardware” of Windows XP when we’re absolutely sure that the computer is not accessing the flash drive anymore possibly means that the computer is constantly saving an “autorun.inf” file onto the flash drive because of the infection. It is not a sure sign of an infection though because there are exceptions to the rule.


II. E. Signs of Infection – Different Title in Internet Explorer

There are worms that use the title bar of Internet Explorer for “bragging rights”. They label it with their own statements like “I WAS HERE” or something to that effect. Unless we ourselves edited the registry to change the title of Internet Explorer, it’s a sign that our computer is infected.


II. F. Signs of Infection – Different Folder Icons and/or Missing Folders

There is a type of worm that hides the folders in our root drives and then camouflages itself as an executable file with a fake folder icon mimicking the name of the folder/s it hid. If we look closely, the folder icon it uses is a bit different from our typical Windows XP folder icon (hopefully).


Prevention of Infection


I. A. Prevention of Infection – Antivirus Software Scan

It is always a good idea to scan your flash drive using your antivirus software BEFORE doing anything else with the flash drive, even if it’s just selecting an action when Windows prompts you with a question as to what to do.


I. B. Prevention of Infection - Using My Computer to Access Flash Drive

NEVER attempt accessing your flash drive by double-clicking on the drive letter of your flash drive on the right side of your “My Computer” window (common way to access a disk is to open “My Computer” and then double-clicking on the drive letter). Using the “My Computer” icon actually just executes “explorer.exe” or Windows Explorer (the main file manager of the Microsoft Windows operating system) and creates another instance of it. Double-clicking on your drive/flash drive this way “executes” the drive. When Windows “executes” a drive, it searches for an “autorun.inf” file in the root folder of the drive and runs the executable that the “autorun.inf” file points to. If the flash drive is infected with a malicious program set to “auto run”, the computer is then infected.

There are two ways to access a drive safely:
  1. Open “My Computer”, click on the “Folders” icon on the toolbar, click on the drive on the left (Folders explorer bar) to see the contents of the drive without “activating” the drive.
  2. Press the “E” key (keyboard) while pressing the “Windows” key (between the CTRL and ALT keys on the keyboard) to open Windows Explorer with the Folders window open already.


I. C. Prevention of Infection – Checking For Suspicious Files (cmd)

Check for suspicious files using the command prompt (see Section III-A for more details) at least in the root folders of all your drives (including flash drives). No drive (except for CDs/DVDs and some specially unique flash drives that have loaders) should have the “autorun.inf” file on them. Typical hidden/system files/folders on your Drive C: are the “autoexec.bat, boot.ini, config.sys, hiberfil.sys, io.sys, msdos.sys, ntdetect.com, ntldr, pagefile.sys” files and [recycled] and [System Volume Information] folders.


Basic System Troubleshooting for Windows


  1. Prevention of Infection
    1. Antivirus software scan
    2. Using My Computer to access flash drive
    3. Checking for suspicious files using the command prompt
  2. Signs of Infection
    1. Disabled command prompt, task manager, and/or registry editor
    2. Shutdown upon execution of the command prompt
    3. Missing “Folder Options” menu item in the Tools menu in Windows Explorer
    4. Unable to safely remove flash drive despite inactivity
    5. Different title in Internet Explorer
    6. Different folder icons and/or missing folders
  3. Windows Tools
    1. Command Prompt
    2. Registry Editor
    3. Group Policy Management
  4. Tackling Infection Side Effects / Remnants
    1. Disabled Command Prompt
    2. Disabled Task Manager
    3. Disabled Registry Editor
    4. Missing “Folder Options”
    5. Shutdown on “cmd”
    6. Traces of “autorun.inf”
    7. Suspicious processes/threads in the Task Manager
    8. Unable to open drive normally in My Computer
  5. Other Tools
    1. Hiren’s Boot CD
    2. BartPE
    3. Linux Boot CD
    4. UBCD (Ultimate Boot CD)

Friday, July 29, 2011

Customize the log-on screen


Changing the Windows log-on screen used to involve some complicated and potentially dangerous hacks, but not any more - Windows 7 makes it easy.

  1. First, browse to HKEY_LOCAL_MACHINE\Software\Microsoft\Windows\CurrentVersion\Authentication\LogonUI\Background in REGEDIT, double-click the DWORD key called OEMBackground (not there? Create it) and set its value to 1.
  2. Now find a background image you'd like to use. Make sure it's less than 256KB in size, and matches the aspect ratio of your screen as it'll be stretched to fit.
  3. Next, copy that image into the %windir%\system32\oobe\info\backgrounds folder (create the info\backgrounds folders if they don't exist). Rename the image to backgroundDefault.jpg, reboot, and you should now have a custom log-on image.

Start Menu Tips and Tweaks

Many people overlook the Start Menu, rarely using it except as a jumping off point to run an application or get to the Control Panel. But there's actually plenty you can do with it.

Search the Internet from the Start Menu

Note: This tip relies on the Group Policy Editor, which isn't available in some versions of Windows 7. Thus, this tip will not work if you have the Home Premium, Starter, or Home Basic editions of Windows 7.
Enabling Internet search from the Start Menu
Enabling Internet search from the Start Menu.
The Start Menu's search box is a convenient way to search through your PC -- but you can also have it do double-duty and perform Internet searches as well. To enable this feature:
  1. In the Start Menu search box, type GPEDIT.MSC and press Enter to run the Group Policy Editor.
  2. Go to User Configuration --> Administrative Templates --> Start Menu and Taskbar.
  3. Double-click "Add Search Internet link to Start Menu," and from the screen that appears, select Enabled. Then click OK and close the Group Policy Editor.
  4. From now on, when you type a search term in the Search box on the Start Menu, a "Search the Internet" link will appear. Click the link to launch the search in your default browser with your default search engine.

Customize the Shut down button

The default action of the Start Menu's Shut down button is to turn off your PC. If you want to use the button for another action, such as restarting your PC, you click the arrow to the right of the Shut down button and select an action from the drop-down menu.
What if you rarely shut your PC down completely but frequently restart it? You can change the Shut down button's default action to be Restart -- or Switch user, Log off, Lock, Sleep or Hibernate.
To change your default, right-click the Start button and select Properties. On the Start Menu tab, click the "Power button action" drop-down menu and select which action you want to be the default. Then click OK, and OK again.

Add a Videos link to the Start Menu

The Windows 7 Start Menu includes links to your Pictures and Music folders, but not to your Videos folder. If you watch a lot of videos and want a link to them on your Start Menu, here's what you can do:
Displaying Videos folder on Start Menu
Displaying the Videos folder on the Start Menu.
1. Right-click the Start button and select Properties.
2. On the screen that appears, go to the Start Menu tab and click Customize.
3. In the dialog box that appears, scroll to the bottom, look for the Videos section, select "Display as a link," and click OK and then OK again.
If you'd prefer that Videos display as a menu, with links to files and submenus, instead select "Display as a menu."

Windows 7 Keyboard Shortcuts


Windows + + (plus key)

Windows + - (minus key)


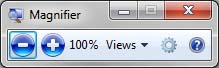
Pressing the Windows and plus or minus keys activates the Magnifier, which lets you zoom in on the entire desktop or open a rectangular magnifying lens to zoom in and out of parts of your screen. You can customize the Magnifier options to follow your mouse pointer or keyboard cursor. Keep in mind that so far, the Magnifier only works when Aero desktop is enabled.

Maximize and Minimize

Windows + Up

Windows + Down

Windows + Shift + Up

Windows + Shift + Down


Fill up half of the screen.

Windows + Left

 Windows + Right

 One of the new features of Windows 7 is the ability to automatically make a window fill up half of your screen by dragging to the left or right. This pair of shortcuts performs the same function without your mouse. Once a window is fixed to one side of the screen, you can repeat the shortcut to flip it to the other side. This is useful if you’re extending a desktop across multiple monitors, which prevents you from executing this trick with a mouse. 

Windows + Home

This shortcut performs a similar function to hovering over a window’s peek menu thumbnail in the Taskbar. The active window will stay on your desktop while every other open application is minimized. Pressing this shortcut again will restore all the other windows.

Windows + E

Automatically opens up a new Explorer window to show your Libraries folder. 

Windows + P

Manage your multiple-monitor more efficiently with this handy shortcut. Windows + P opens up a small overlay that lets you configure a second display or projector. You can switch from a single monitor to dual-display in either mirror or extend desktop mode.

Windows + Shift + Left

Windows + Shift + Right

If you are using two or more displays (and who isn’t, these days?), memorize this shortcut to easily move a window from one screen to the other. The window retains its size and relative position on the new screen, which his useful when working with multiple documents. Utilize that real estate!

Windows + [Number]

Programs (and new instances) pinned to your Taskbar can be launched by hitting Windows and the number corresponding to its placement on the Taskbar. Windows + 1, for example, launches the first application, while Windows + 4 will launch the fourth. We realize that this is actually one key-press more than just clicking the icon with your mouse, but it saves your hand the trouble of leaving the comfort of the keyboard.

Windows + T

Like Alt + Tab (still our all time favorite Windows specific shortcut), Windows + T cycles through your open programs via the Taskbar’s peek menu.

Windows + Space

This combo performs the same function as moving your mouse to the bottom right of the Taskbar. It makes every active window transparent so you can view your desktop. The windows only remain transparent as long as you’re holding down the Windows key.

Ctrl + Shift + Click

Hold down Ctrl and Shift while launching an application from the Taskbar or start menu to launch it with full administrative rights.

Ctrl + Click

Hold down Ctrl while repeatedly clicking a program icon in the Taskbar will toggle between the instances of that application, like multiple Firefox windows (though not browser tabs).


Thursday, July 28, 2011

Speed Up Browsing

When you connect to a web site your computer sends information back and forth. Some of this information deals with resolving the site name to an IP address, the stuff that TCP/IP really deals with, not words. This is DNS information and is ...used so that you will not need to ask for the site location each and every time you visit the site. Although Windows XP and Windows XP have a pretty efficient DNS cache, you can increase its overall performance by increasing its size. You can do this with the registry entries below:

Windows Registry Editor Version 5.00
[HKEY_LOCAL_MACHINE\SYSTEM\CurrentControlSet\Services\Dnscache\Parameters]
"CacheHashTableBucketSize"=dword:00000001
"CacheHashTableSize"=dword:00000180
"MaxCacheEntryTtlLimit"=dword:0000fa00
"MaxSOACacheEntryTtlLimit"=dword:0000012d

Make a new text file and rename it to dnscache.reg. Then copy and paste the above into it and save it. Merge it into the registry.

SPEED UP UR ACROBAT READER (ALMOST LIKE NOTEPAD)

1. Go to the installation folder of acrobat reader
(C:\program files\adobe\acrobat\reader\.. whatever)

2. Move all the files and folders from the "plugins" directory to the "Optional" directory. (I repeat.. cut and paste the files NOT copy &... paste).

Also make sure that acrobat reader is not open else it will lock the files and not allow you to move the files).
Now your acrobat reader will load very fast and almost as good as notepad..